In the world of electrical systems, knowledge is power. And when it comes to ensuring safety and functionality, understanding the basics is essential. One crucial aspect that every beginner should have is a familiar test outlet with multimeter. By mastering this skill, you can confidently navigate the intricacies of electrical troubleshooting. We will discuss how to test outlet with multimeter, providing you with the professional information you need with professional electrical services. So, let’s dive in and unravel the mysteries of electrical testing.
Importance of Testing Outlet Polarity
The significance of utilizing a test outlet multimeter cannot be emphasized enough in professional settings. When outlets are wired, the current is carried through the hot wire, the neutral wire completes the circuit, and the ground wire provides safety. However, if the outlet polarity is reversed, it can result in severe electrical hazards such as electric shock or appliance damage. Employing a testing outlet with a multimeter is a straightforward yet highly effective method to detect potential issues and guarantee a secure electrical environment. “Test outlet polarity to ensure safety before installing a security light.”
A brief overview of using a multimeter to test outlet polarity
How to use a multimeter to test an outlet? To test the outlet polarity, you can check outlet with multimeter, a professional tool used by electricians and knowledgeable individuals. This device measures the voltage and helps determine if the outlet wiring is correctly arranged. For this test, follow these steps:
- Set the multimeter to the appropriate AC voltage range.
- Insert one probe into the outlet’s hot slot.
- Insert the other probe into the outlet’s neutral slot.
- Read the voltage on the multimeter’s display.
- Reverse the searches and reread the voltage.
- If the voltage reading remains positive regardless of probe positions, it indicates reversed polarity.
- Ensure safety while working with electricity.
- Consult a licensed electrician if unsure or uncomfortable performing tests.
Understanding Outlet Polarity
Outlet polarity is a crucial aspect of electrical outlets, ensuring the proper arrangement of the hot and neutral wires. The vital task of transporting electrical current from the power source to the outlet is performed by the hot wire, while the neutral wire facilitates the safe return path for the current. Understanding and adhering to the correct outlet polarity in maintaining a safe and functional electrical system.
It is crucial to ensure proper outlet polarity for several reasons:
- Correct outlet polarity reduces the risk of electrical shock. When wiring is done incorrectly, it can lead to exposed live wires, resulting in potential hazards.
- Following proper outlet polarity is required by electrical codes and regulations. Adhering to these standards ensures that your electrical system meets safety guidelines.
- Appliances and electrical devices are designed to be connected to outlets with specific polarities. Using outlets with incorrect polarity can cause devices to malfunction or be damaged.
- Identify outlet issues using a multimeter for effective troubleshooting. Understanding outlet polarity in relation to electrical wiring color codes.
Hot, Neutral, and Ground Wires
It’s essential to familiarize yourself with the three primary wires: hot, neutral, and ground. Electrical current travels via the hot wire from the source to the outlet, while the neutral wire completes the circuit by providing a return path for the current. In contrast, the ground wire acts as a safety precaution, redirecting any excess current to the ground in case of a fault or short circuit.
Risks of Incorrect Outlet Polarity
Incorrect polarity can give rise to potentially hazardous electrical situations, posing risks to individuals and appliances. Electric shocks, damage to devices, and the potential for fire hazards are just a few examples of the consequences that can arise from improper outlet polarity.
When testing an electrical outlet, it is essential to consider the following risks associated with incorrect outlet polarity:
1. Electric Shocks: Reversed polarity can lead to the flow of electricity in unexpected directions, increasing the likelihood of electric shocks. This poses a significant danger to individuals, mainly when coming into contact with exposed wiring or faulty appliances.
2. Appliance Damage: Appliances rely on the correct flow of electricity to function optimally. Incorrect outlet polarity can disrupt this flow, potentially causing damage to appliances or reducing their lifespan. This may demand expensive repairs or the complete replacement of the devices.
3. Fire Hazards: Improper outlet polarity can create conditions that increase the risk of electrical fires. When electrical currents flow incorrectly, it can generate excessive heat, leading to melted wires, short circuits, or even electrical fires.
Choosing a Multimeter

Types of multimeters
There are several types of multimeters available, each with its unique features and applications. Here are the common types of multimeters:
- Analog Multimeters: Analog multimeters use a needle and scale to display measurements. They are simple, inexpensive, and suitable for basic measures. However, they are less precise than digital multimeters and can be more challenging to read accurately.
- Digital Multimeters (DMMs): Digital multimeters provide measurement readings as numerical values on a digital display. They offer higher accuracy, better resolution, and a more comprehensive range of features than analog multimeters. DMMs are the most commonly used type of multimeter and are available in various models and price ranges.
- Auto-ranging Multimeters: Auto-ranging multimeters automatically select the appropriate measurement range for the measured quantity. This feature eliminates the need for manual range selection and simplifies operation. Auto-ranging multimeters are convenient, especially for beginners or those with varying measurement values.
- Manual-ranging Multimeters: Manual-ranging multimeters require users to select the appropriate measurement range manually. While they offer more control over the measurement range, they need a good understanding of the expected values to avoid using incorrect ranges.
- True RMS (Root Mean Square) Multimeters: True RMS multimeters are capable of accurately measuring both AC and DC signals, providing accurate readings even with distorted waveforms. They are ideal for measuring non-linear loads, electronic devices, and electrical systems with harmonics.
- Clamp Meters: Clamp meters, also known as current clamp meters or clamp-on meters, allow non-contact current measurements by clamping around a conductor. They help measure high currents and tight spaces where direct contact is not possible or safe.
- Benchtop Multimeters: Benchtop multimeters are larger, more advanced multimeters designed for lab or workshop use. They offer high accuracy, multiple measurement functions, and larger displays and often come with additional features and interfaces for data logging or computer connectivity.
- HVAC (Heating, Ventilation, and Air Conditioning) Multimeters: HVAC multimeters are designed for HVAC technicians. They include specialized functions for measuring temperature, airflow, and other HVAC-specific parameters.
- Wireless Multimeters: Wireless multimeters connect to smartphones or tablets via Bluetooth or Wi-Fi, allowing remote control, data logging, and easy data analysis through dedicated apps. They provide convenience and flexibility, especially when working in hard-to-reach areas.
When selecting a multimeter, consider the intended application, required features, accuracy, and budget to choose the most suitable type for your needs.
- Decide on the specific tasks you will use the multimeter for
- Look for a high level of accuracy in voltage, current, and resistance readings
- Choose a multimeter with a clear and easy-to-read display
- Ensure the multimeter has a wide enough range to cover your measurement needs
- Consider safety features such as overload protection and safety ratings
- Look for a sturdy and durable build
- Consider the quality and usability of the probes and accessories included
- Choose a well-known and reputable brand
- Determine your budget and find a multimeter that meets your needs within that range
Considering these factors, you can choose a multimeter that meets your requirements and provides accurate and reliable measurements for your electrical work.
Preparing for Testing
It’s time to prepare for testing outlet polarity. However, keep in mind that working with electricity can be dangerous. Therefore, always prioritize safety by following these precautions:
1. Before testing outlet polarity, turn off the power at the circuit breaker or fuse box to avoid electrical accidents.
2. Wear insulated gloves to protect yourself from potential electric shocks.
3: Never touch exposed wires. Always use the appropriate tools to handle them.
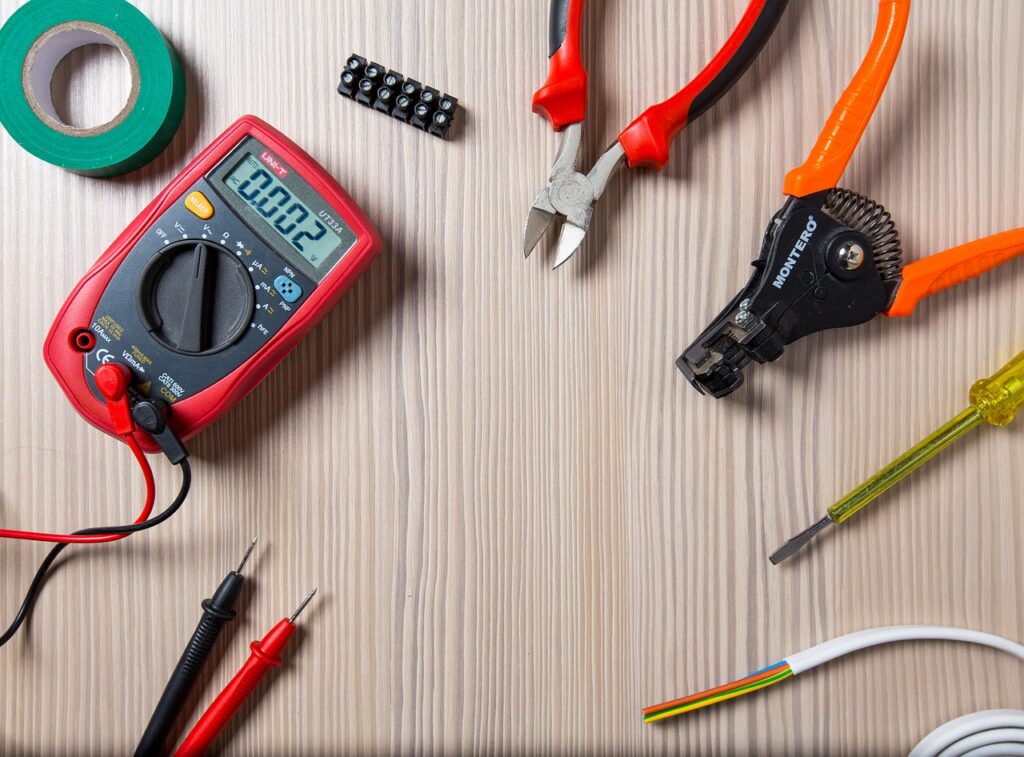
Tools Needed
To test outlet polarity, you will need the following tools:
- Your chosen multimeter will be the primary tool for performing the test.
- These cables connect the multimeter to the outlet for testing. Make sure they have been attached and are in good condition.
- A flathead screwdriver is often used to remove the outlet cover plate for accessibility.
Remember, improper outlet polarity can lead to serious electrical hazards. Therefore, it’s essential to test and ensure correct wiring in your outlets. Protect your appliances by understanding how to test outlet with multimeter?
Testing Outlet Polarity with a Multimeter
Step-by-step instructions for testing outlet polarity using a multimeter
Here are the step-by-step instructions for testing outlet polarity using a multimeter:
1. Set the multimeter to AC voltage mode: Start by turning the dial on your multimeter to the AC voltage setting for the outlet. This mode allows you to measure the alternating current that your outlets provide.
2. Insert the test leads into the multimeter: Your multimeter should have two test leads – one red and one black. Insert the red lead into the jack labeled “VΩmA” or “Volts” and the black lead into the “COM” or ordinary jack. Make sure they are connected.
3. Touch one test lead to the hot wire terminal and the other to the neutral wire terminal. Identify the hot wire, usually black or red, and the neutral wire, generally white. For the hot wire terminal, touch the red lead, and for the neutral wire terminal, connect the black lead.
4. Examine the voltage displayed on the multimeter: You can now read the voltage on the multimeter display. A wired outlet should show a voltage reading between 110-120 volts. How to test 110v outlet with multimeter? Set the multimeter to AC voltage mode, insert one probe into the hot slot and the other into the neutral space, and read the display.
Troubleshooting Common Issues
If you encounter any issues during the testing process, here are a few troubleshooting steps you can take:
- Check connections: Ensure the test leads are connected to the multimeter and the outlet terminals. Loose links can lead to inaccurate readings.
- Consult a professional: If you are unsure about the readings or encounter any unusual results, it is best to consult a licensed electrician. They have the knowledge and expertise to diagnose and fix any electrical issues.
Conclusion
Testing outlet polarity is a critical step in prioritizing electrical safety settings. Employing the use of a multimeter can effectively identify any potential wiring issues that may exist within their electrical systems. This proactive approach allows for immediate action to be taken to rectify any problems that may be detected. It is important, however, to exercise caution when working with electricity, particularly in more complex cases. In these instances, it is highly recommended to seek the assistance of a licensed electrician. In this blog post, we have explored how to test an outlet with a multimeter, providing you with the professional information you need to carry out this important task confidently.
FAQ’s
Q1. What Is a Multimeter Test outlet and How Does It Work?
An effective tool for measuring electrical quantities, including voltage, current, and resistance, is a multimeter. It combines several measurement functions into a single device, making it an essential tool for electricians, engineers, and DIY enthusiasts.
The basic working principle of a multimeter involves using probes that make contact with the tested electrical circuit. The multimeter then displays the measured values on a digital or analog screen, allowing the user to interpret the readings.
Q2. Why Is It Important to Test an Outlet With a Multimeter?
1. Ensure Electrical Safety: Testing an outlet helps identify potential electrical hazards, such as faulty wiring or improper grounding. Identifying such issues can prevent accidents, electrical fires, and damage to equipment.
2. Verify Voltage Levels: By measuring how to check voltage with multimeter, you can confirm if it is within the acceptable range. This is essential for commercial customers who rely on stable and consistent power supply for their operations.
3. Troubleshoot Electrical Problems: How to test outlet with multimeter? If you are experiencing electrical issues in your commercial space, testing the outlets with a multimeter can help identify the source of the problem. This allows for targeted repairs or adjustments, saving time and money.
Q 3. How Can I Safely Test an Outlet Using a Multimeter?
To safely test an outlet using a multimeter, follow these steps:
1. Prep: Ensure you have the necessary safety equipment, including insulated gloves and safety glasses. Also, ensure the multimeter is set to the appropriate measurement range and the probes are in good condition.
2. Turn Off Power: Before testing, it is crucial to turn off the power to the outlet at the circuit breaker. This prevents the risk of electric shock during the testing process.
3. Insert Probes: Insert the multimeter probes into the outlet’s slots, ensuring they make good contact with the terminals. The red probe should go into the positive or hot terminal, while the black probe should go into the negative or neutral terminal.
4. Read the Display: Once the probes are placed, turn on the power and observe the multimeter’s display. It will show the voltage readings, indicating the electrical status of the outlet.
Q4. What Are the Different Readings I Can Expect from Testing an Outlet With a Multimeter?
When testing an outlet with a multimeter, you can expect various readings depending on the measurements. The primary tasks include:
1. Voltage (V): This measures the electrical potential difference between the hot and neutral terminals of the outlet. The standard voltage in most commercial settings is 120 volts.
2. Current (A): This measures the flow of electric current through the outlet. It helps determine if the outlet can handle the electrical load connected to it.
3. Resistance (Ω): This measures the opposition to the flow of electric current in the outlet. Higher resistance values may indicate loose connections or damaged wiring.
Q5. Can a Multimeter Help Me Identify Electrical Issues in an Outlet?
Yes, a multimeter can be a valuable tool for identifying electrical issues in an outlet. By testing the voltage, current, and resistance, you can detect problems such as:
- High current readings may indicate that the outlet is being overloaded, which can lead to overheating and potential fire hazards.
- Fluctuating or inconsistent readings may suggest loose connections within the outlet, which can cause intermittent power supply or even electrical arcing.
- An absence of proper grounding can lead to electric shocks and equipment damage. A multimeter can help identify grounding issues by measuring the resistance between the ground and neutral terminals.
Q6. Is It Necessary to Turn off the Power Before Testing an Outlet With a Multimeter?
Yes, it is essential to turn off the power before testing an outlet with a multimeter. This precautionary measure ensures your safety by preventing the risk of electric shock. Always remember to switch off the power at the circuit breaker before proceeding with any electrical testing.
Q7. How Can I Interpret the Readings from a Multimeter When Testing an Outlet?
Interpreting the readings from a multimeter requires understanding the expected values and comparing them to the standard measurements. Here are some general guidelines:
1. Voltage: The standard voltage for most commercial outlets is 120 volts. If the reading deviates from this value, it may indicate a problem with the electrical supply or the outlet itself.
2. Current: The current reading should be within the safe operating range of the outlet. If it exceeds the recommended limit, it suggests an overload or potential wiring issues.
3. Resistance: Lower resistance values indicate good electrical conductivity, while higher values may suggest loose connections or damaged wiring. However, specific resistance readings may depend on the type of outlet and wiring used.
Q8. Are There Any Safety Precautions I Should Take When Using a Multimeter to Test an Outlet?
Absolutely! Wearing the proper personal protection equipment, such as safety goggles and insulated gloves, is essential. Additionally, ensure that the multimeter and its probes are in good condition and calibrated. Never touch the metal part of the probes with your bare hands, and always handle them with care. Always follow the manufacturer’s guidelines and recommendations for safe usage.
Q9. What are some common problems that can be detected by testing outlet with a multimeter?
Testing outlets with a multimeter can help identify joint problems, including short circuits, open circuits, loose connections, faulty wiring, and improper grounding. Detecting these issues early on can prevent more complex and dangerous electrical problems, saving you time and money and ensuring safety.