Installing a security light from scratch is a crucial step towards ensuring the safety and protection of your property. Given the growing demand for more durable security measures, having a well-lit exterior not only deters potential intruders but also provides peace of mind for you and your loved ones. Let’s discuss the importance of installing a security light and the advantages of a DIY installation. So, let’s dive into the professional information and discover how To Install A Security Light From Scratch.
To install a security light from scratch, follow these steps
- Choose the right location.
- Gather the necessary tools.
- Turn off the power.
- Mount the fixture.
- Connect the wiring.
- Test the connections.
- Secure the wiring.
- Adjust settings.
- Power on and test.
Varela American Electric Provides Security Lighting Services for Commercial Properties in Houston.
Pre-Installation Preparations
It is crucial to make all the necessary pre-installation preparations. Following these instructions will guarantee a seamless installation and assist you in getting the intended outcomes.
Assessing the Desired Location
1. Consider optimal placement for maximum coverage: Begin by identifying the areas of your property that require enhanced security. Consider the critical entry points, dark corners, or other vulnerable spots that could benefit a security light.
2. Ensure access to power source and wiring feasibility: Take a moment to check if there is a nearby power source that you can tap into for your security light. Additionally, assess the feasibility of running wiring to the desired location. “Ensure proper wiring by checking outlet polarity with a multimeter.”
3. Evaluate potential obstacles or obstructions: Look for barriers or blocks hindering the installation process. It could be trees, bushes, or other structures that may interfere with the light’s functionality.
Selecting the Right Security Light
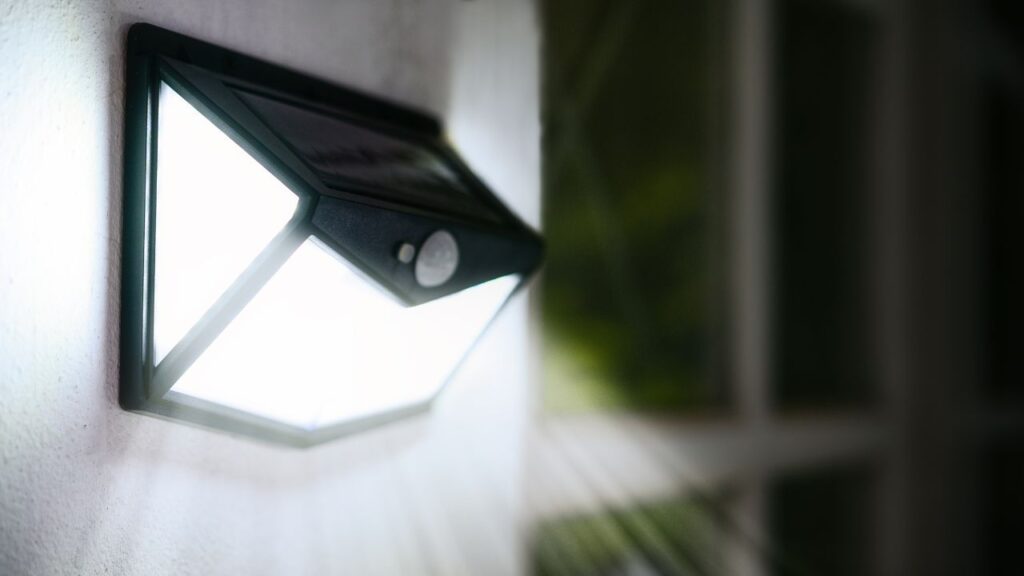
1. Types of security lights available: There are various security lights, including motion-sensor lights, dusk-to-dawn lights, and more. Each type has unique features and functionalities, so consider your specific needs and preferences.
2. Consider desired features and functionality: Consider the features you want in your security light. For example, an adjustable sensitivity, range, or even the ability to connect to a smart home system. Make a list of your requirements to help you narrow down your options.
3. Choose a light that fits the aesthetics of your property: While functionality is key, it’s also important to consider the aesthetics of your property. Look for a security light that complements the style and design of your home, ensuring it blends well into its surroundings.
Gathering the Necessary Tools and Equipment
1. List the required tools: Assemble all required tools and equipment before beginning the installation process. This may include a ladder, screwdriver, wire stripper, and other specific tools the manufacturer recommends.
2. Emphasize the importance of safety equipment: Safety should always be a top priority. To keep yourself safe during the installation procedure, wear the proper safety gear, such as goggles and gloves. “Resolve electrical issues, such as non-working outlets, for optimal safety.”
Following these pre-installation preparations, you’ll be well-equipped and ready to install your security light from scratch. Remember, taking the time to plan and gather the right tools will save you time and ensure a successful installation.
Installation Process – Step by Step
Turning off the Power Supply
Before starting any electrical work, it is crucial to turn off the power supply to the installation area. To guarantee your safety, adhere to these easy steps:
1. Locate the appropriate circuit breaker for the area where you will install the security light. Flip the switch to the off position.
2. Double-check to ensure that no electricity is flowing to the installation area. Make sure the power is off by using a non-contact voltage tester before continuing.
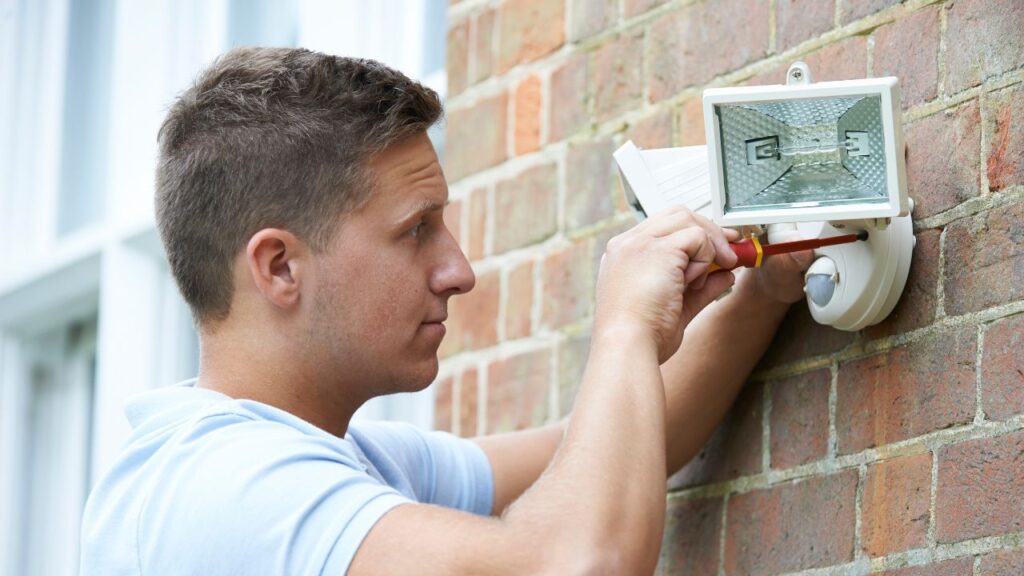
Mounting the Security Light Fixture
Once the power supply is turned off, you can proceed with mounting the security light fixture. Follow these steps for a secure and level installation:
1. Refer to the manufacturer’s instructions for the security light fixture. These instructions will guide you on attaching the fixture to the wall or desired location.
2. Ensure the fixture is fastened to the wall or mounting surface. Use a level to make sure the institution is straight-aligned.
Wiring the Security Light
Now that the fixture is mounted, it’s time to wire the security light. Here’s how you can do it in the best way:
1. Identify the existing electrical wiring that will power the security light. Protect the wiring, taking the necessary precautions to avoid contact with live wires. “Understanding wiring color codes: essential for installing a security light.”
2. Attach the security light’s cables to the matching wires in the junction box. Match the black wire (hot) to the black wire, the white wire (neutral) to the white wire, and the green or bare wire (ground) to the corresponding ground wire.
3. Secure the wire connections using wire nuts and cover them with electrical tape for added protection and to prevent accidental disconnections.
Adjusting Settings and Testing
With the security light wired and ready, it’s time to adjust the settings and ensure functionality. Follow these steps to configure the security light according to your preferences:
1. Consult the manufacturer’s instructions to learn about the different settings and features of the security light. Adjust the settings, such as sensitivity, duration, and brightness, according to your specific needs.
2. Activate the power supply by flipping the circuit breaker switch back on. Test the functionality of the security light by triggering its sensors and turning it on. Verify that the light illuminates and responds to motion or other activating mechanisms.
Adjusting the Detection Range and Sensitivity
1. Customize the Motion Detection Settings
It is essential to adjust the detection range and sensitivity to maximize the effectiveness of your security light. Most security lights come with adjustable settings, allowing you to customize the motion detection range. Take the time to change these settings according to your specific needs. By doing so, you can ensure that the light only activates when necessary, minimizing false alarms and saving energy.
2. Avoiding False Alarms
False alarms can be a nuisance, and adjusting the motion detection settings can help prevent them. Factors such as nearby trees, moving objects, or pets can trigger your security light. Consider changing the sensitivity level to eliminate false alarms without compromising the light’s ability to detect genuine threats.
Regular Maintenance and Care

1. Periodic Cleaning
It is crucial to clean your security light to maintain optimal light output. Over time, dust, debris, and grime may accumulate on the exterior of the soft surface, reducing its brightness and effectiveness. To clean the light fixture, use a gentle cloth or sponge and a small amount of bleach. Refrain from harsh chemicals or abrasive materials as they may cause surface damage.
2. Inspect and Tighten Connections
Inspecting the connections of your security light is essential to ensure its longevity and reliability. Over time, vibrations and weather conditions may loosen the electrical connections. Take the time to inspect and tighten any loose connections, ensuring proper functionality. This simple maintenance step can prevent potential issues and extend the lifespan of your security light.
Conclusion
By following the installation process outlined in this guide and considering the post-installation tips and considerations, you have taken the necessary steps toward enhancing your home security. Adjusting the detection range and sensitivity, as well as performing regular maintenance, will optimize the performance and ensure the longevity of your security light. Investing in a security light not only increases your peace of mind but also enhances the security of your property. With your installed security light, your home is better equipped to deter potential intruders and make your home a safer place for you and your family.
FAQ’s about Installing a Security Light
1. What is a security light?
A security light is an outdoor lighting fixture designed to increase visibility and deter potential intruders or unwanted guests. It is installed near entrances, driveways, or other areas that require heightened security.
2. Do I need any prior electrical experience to install a security light?
While prior electrical experience is not mandatory, it is recommended that you are at least somewhat knowledgeable about safety procedures and electrical wiring. If you are unsure of your capabilities, it is always best to consult with a professional electrician.
3. What tools and materials will I need for the installation?
To install a security light, you will need the following tools and materials:
- Security light fixture
- Electrical cables and connectors
- Screwdriver
- Wire strippers
- Voltage tester
- Ladder or step stool
- Mounting bracket or screws (if necessary)
- Drill (if necessary)
- Outdoor-rated electrical box (if necessary)
4. Can I install a security light or hire a professional?
Installing a security light can be a DIY project, but it depends on your comfort level with electrical work. If you have doubts about your abilities, hiring a qualified electrician is always advised to guarantee a secure and appropriate installation.
5. How do I choose the right location for my security light?
When selecting a location for your security light, consider areas that require enhanced visibility, such as entrances, garages, or dark corners of your property. Additionally, ensure the light is positioned not to cause unnecessary glare or shine into neighboring properties.
6. Are there any specific safety precautions I should take during the installation process?
Yes, safety should always be a top priority when working with electricity. Before installing, turn off the power supply to the area where you will be working. Test the power with a voltage tester to ensure it is completely shut off. Additionally, avoid working in wet conditions and always use proper ladder safety techniques if you need to climb.
7. How do I connect the wiring for my security light?
The specific wiring instructions may vary depending on the model of your security light; however, the general process involves connecting the black wire (hot) from the light fixture to the black wire in your electrical box and the white wire (neutral) to the white wire. It is important to follow the manufacturer’s instructions and ensure secure connections using wire connectors.
8. What should I do if I encounter any issues during the installation?
If you encounter any issues during the installation process, such as faulty wiring, inadequate power supply, or difficulties mounting the fixture, it is best to seek professional help. A licensed electrician can troubleshoot and resolve problems to ensure a safe and functional installation.